|
Tutorial: Adding Contacts
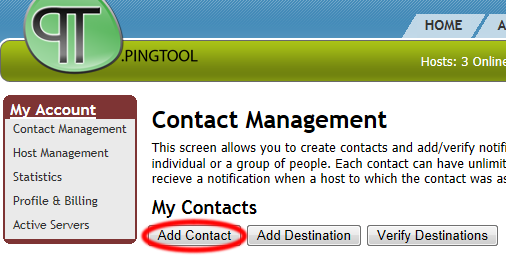
Before configuring anything else, you first need to setup your contacts. A contact represents a person or a group of individuals to be notified when a monitoring alert occurs. To access the contact setup screen go to My Account and click Contact Management:
To add your first contact, simply click Add Contact button on the management screen:
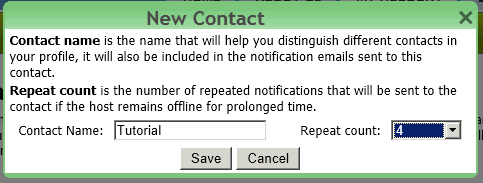
A dialog box will appear asking for contact name and repeat count. Choose and appropriate name for the contact; it will be included in the notification emails. Repeat count allows you to choose how many repeated notification will be sent to this contact until the monitoring issue is resolved. You may choose to send repeated notification "forever", in which case a notification will be sent repeatedly on a set interval until the connection issue is resolved. Setting repeats to none will cause the system to send only one notification when connection issue arises and not repeat until the issue arrises again after being resolved. Click Save to create the contact.
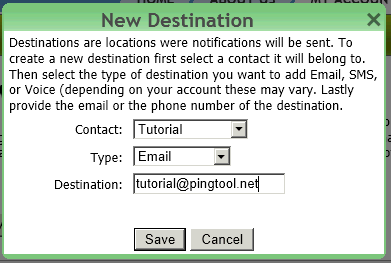
Onece the contact is created, you need to add destinations to it. A destination is either an e-mail address or a phone number where notifications will be sent. Click the add destination button which will show the New Destination dialog:
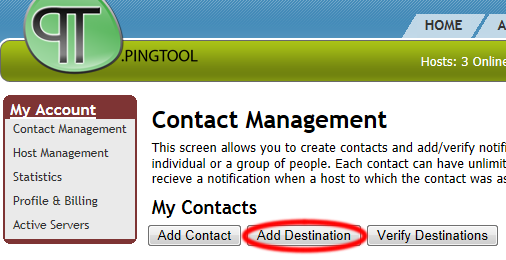
Select the contact to which new destination should be added. Then select the type of destination it is(e-mail, SMS, or Voice). In the destination type in either the e-mail address or the phone number where the notification is to be sent. Click Save to complete the addition.
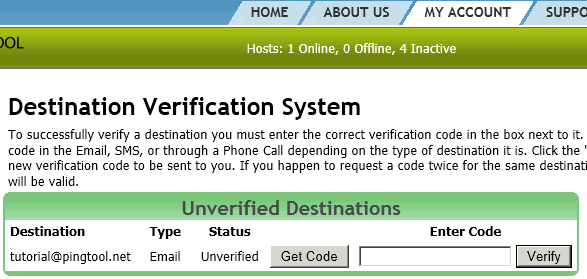
You are almost done. To prevent the misuse of the system we require you to verify your destination. Simply click Verify Destinations button to access our verification system.
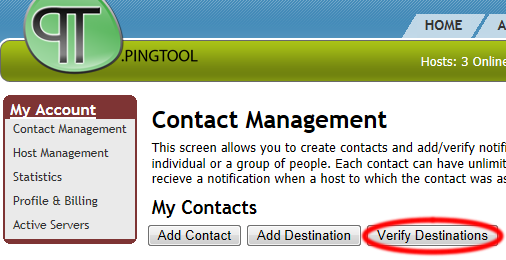
Click the Get Code button to tell our system to send a verification code to your destination. Once you receive the code enter it into the box provided and click Verify to complete the verification process.
Once the destination has been verified you need to activate it by clicking the checkbox next to it on the Contact Management page:

Go ahead and add more contacts/destination if you need them and then proceed to configuring your monitoring hosts.
Home | About Us | Terms Of Use | Privacy Policy | Contact Us | © 2008-25 NN-TEK, LLC |

